Leave the traditional way of pressing your design with a household iron. Now it’s time for you to switch to Cricut EasyPress 2. It’s been more than a year since I started using an EasyPress 2 machine instead of an iron. I complete my work in the blink of an eye without harming myself. This Cricut machine comes with a machine speed and an iron feature.
Apart from that, I prefer this press as it swiftly finishes iron-on projects without causing any serious damage. Besides, there are tons of DIY projects that I can create with my EasyPress with a snap of a finger. As an expert in this field, I want to ensure that you are well-versed with the concepts of this Cricut Heat Press, along with its features, supplies, and many more.
What are Cricut EasyPress 2 Salient Features?
Before helping you to make a final decision, give me a chance to share with you some of the prominent features of EasyPress 2. After coming across the features, it will get more straightforward for you to decide whether investing your savings in buying this press is going to be a good decision or not. Have a look at the features below:
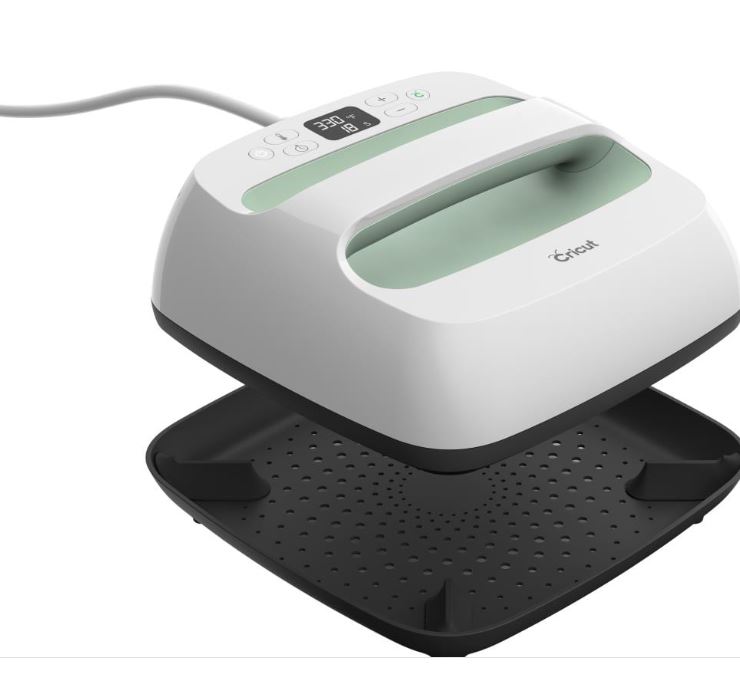
This Cricut Heat Press is developed explicitly for heating purposes only. This press is compatible with all heat-transfer vinyl (HTV). In addition, EasyPress 2 gets heated up within 3 minutes and works by applying gentle pressure on the material.
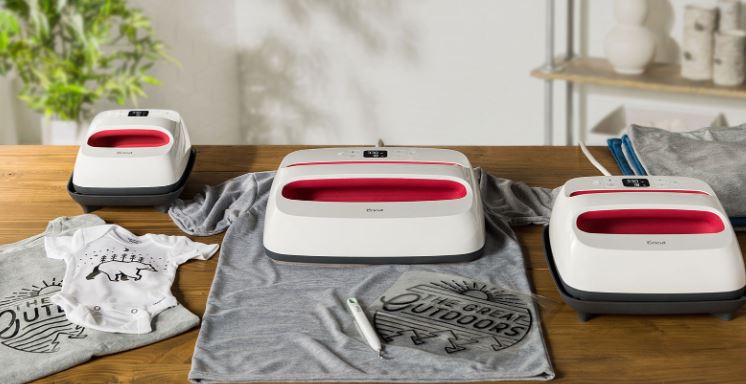
Also, this press is available in different colors as well as sizes, giving me an option to choose as per my project type. It has been categorized into three different sizes: Cricut EasyPress 2 “6 x 7”, EasyPress 2 “12 x 10”, and EasyPress 2 “9 x 9”. On the other hand, this heat press is available in Mint, Lilac, and Raspberry colors.
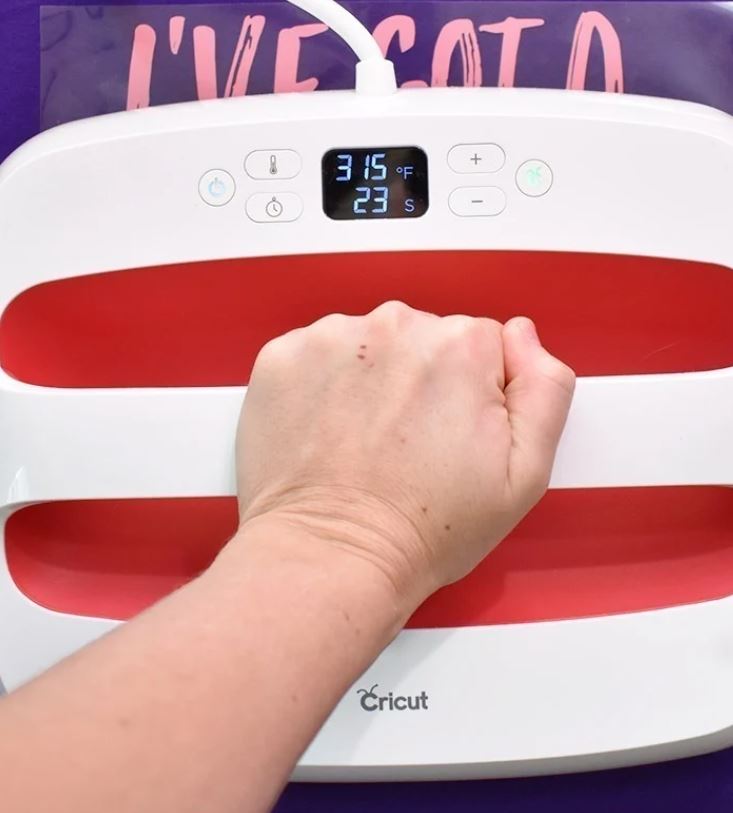
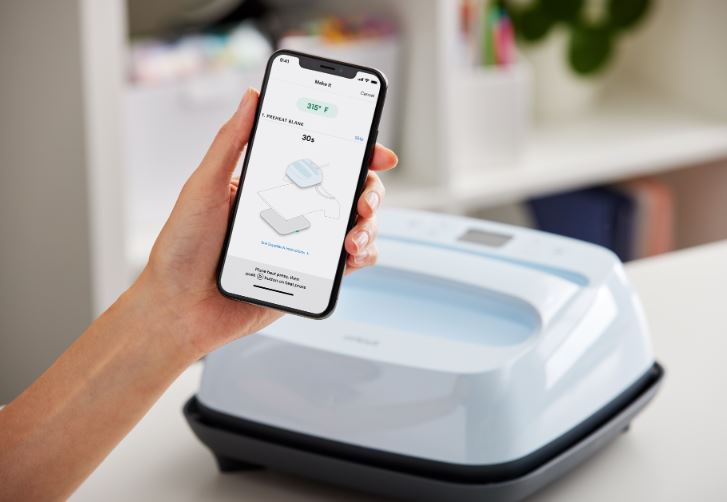
Besides, it comes with a digital display panel that shares temperature and timing details. This machine can quickly heat up to 400*F, making me experience an effortless pressing experience. Moreover, I can change the press settings without manual work by installing the Cricut EasyPress 2 app.
On the contrary, this machine comes with an insulated Safety Base that allows it to take some rest after transfer. Equally important, this Cricut press has an auto-shutoff feature that instantly turns it off to avoid any accidents in the future.
After grabbing so much content about this versatile heat press, let’s take a step forward and learn about the supplies that come along with it.
What Supplies Come With Cricut EasyPress 2?
After getting the delivery to my doorstep, I will unbox the boxes and learn about the items inside. Have a look at the list of those supplies in the following pointers:
- Cricut EasyPress 2 ( 6 x 7, 9 x 9, and 12 x 10)
- Safety Base
- Welcome Book or User Guide
- Materials for a practice project
- Warranty Card
Since I’ve received all the crucial supplies, I am now capable enough to create a customized t-shirt using this EasyPress.
How to Use Cricut EasyPress 2?
After collecting details about this heat press’s features as well as supplies, I am now going to utilize my heat press to create a customized t-shirt. Now, to get the expected craft with my EasyPress 2, I am going to consider the given below steps:
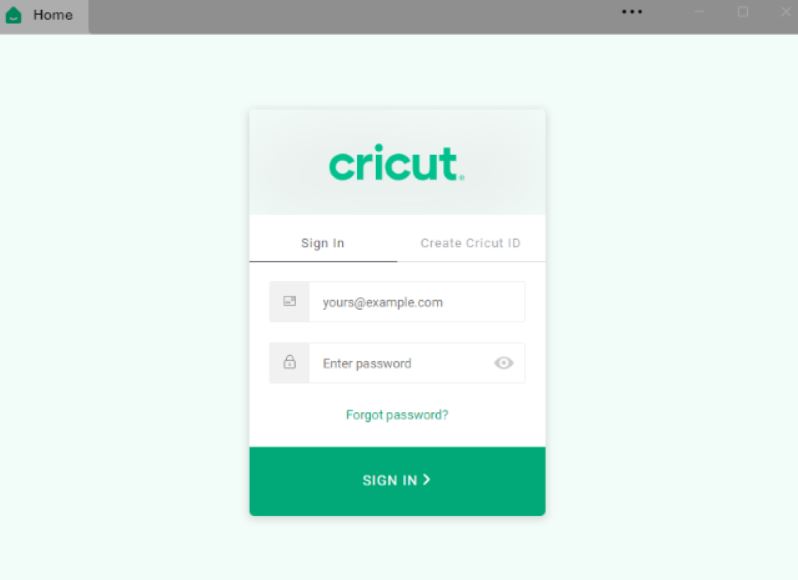
Step 1: Log in to the Cricut App and Draw a Design
- Start the process by logging in to your Cricut app via login details at the Sign In page.
- Now, press the New Project and tap the Upload button given on the canvas screen.

- Next, click the Upload Image and then Browse, appearing in the middle of the new page.
- Following this, choose your image from the system folder, move it to the page, and then select the Complex option.
- After selecting the option, tap the Continue button visible on the right side of your system.
- Next, zoom out the image, and it will remove the background from your image.
- Further, choose your image from the Recently Uploaded Images area and tap the Insert Image box.
- Following this, start resizing your design as per your choice on the canvas screen.
- Afterward, press the Make It button visible under the green box on the top-right side of the canvas.
Step 2: Prepare the Mat for Your Design
- Following the completion of the design on the Cricut app canvas, tap the Mirror button.
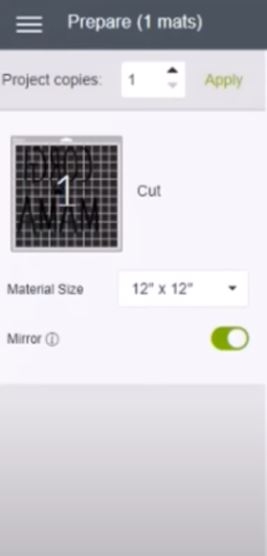
- Now, you will notice that the text on the mat will get flipped over, and then hit the Continue option.
- Following this, we will now proceed towards placing the chosen material on the cutting mat.
Step 3: Load the Material With a Cricut Mat
- Following this, set your material into iron-on and start placing it on your Cricut mat.
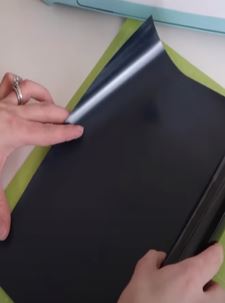
- After sticking the material equally across the mat, turn on your cut-die machine and start loading the mat in it.
- Once the cutting process comes to an end, weed out your design using the weeding tool.
- However, you need to ensure that you are correctly using the tool while removing the extra material.
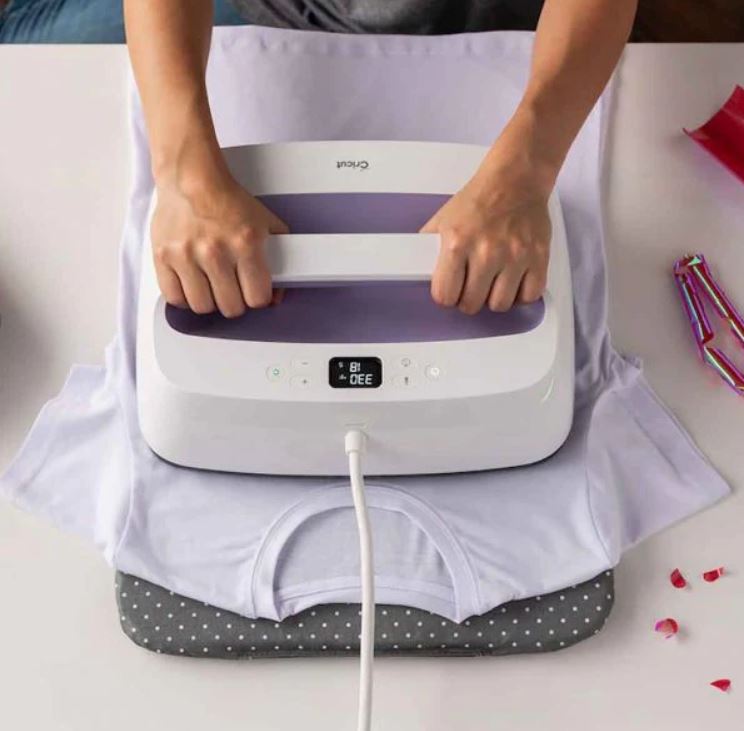
Step 4: Transfer Your Design Using Cricut EasyPress 2
- Following the completion of weeding out the materials, I am now going to preheat my EasyPress 2 via the Heat app.
- Next, place the press on the t-shirt for at least 3 to 5 seconds to remove wrinkles from it.
- After that, place the blank on the pressing mat, fold the design, and gently move the machine across the design.
- Finally, peel off the carrier sheet and smoothly press your machine onto the design.
Frequently Asked Questions
Question: What Are Some Tips and Tricks to Use Cricut EasyPress 2?
Answer: Before using this Cricut Heat Press, all DIYers need to ensure that they follow some essential tips & tricks:
- It would help if you placed the machine, material as well, and the mat on a flat surface.
- It’s critical to preheat EasyPress 2 as well as fabric before beginning the heating process.
- Check that your heat-transfer vinyl design is centered and aligned on your blank.
Question: What Projects Can I Make With My Cricut EasyPress 2?
Answer: Some famous projects that all the crafters can make out of their respective EasyPress 2 are as follows:
- Rolling laundry bin
- Spring flower market sign
- Cruise shoes
- Family cruise shirts
- DIY pillow design
- Teacher appreciation gift
- GOT shirts
- Customized banner
- Stocking tag
- Stocking holder
- Unicorn hair don’t care
- Baby onesies
Question: Is Adding Cricut EasyPress 2 to the Craft Room a Good Decision?
Answer: If you are a keen crafter and want to take advantage of every opportunity to learn something creative, then you should definitely buy EasyPress 2. This lightweight and easy-to-carry machine is compatible with all HTV materials. Other than that, it can heat up to 400*F (205*C), giving fast and effortless results that last long. With so many great features, you should definitely add this machine to your craft room.
Visit: cricut.com/setup
Comments
Post a Comment